Monday, June 11, 2012

Smokin' in Seattle 2012

Saturday was the 6th Pacific Northwest Eggfest, put on by the PNW Egg distributor, AES, in Kent.  Another great event with so much great food.  The best part is seeing old friends, making new ones.  All my favorite AES staff were back, working as hard as ever.  They just keep getting more organized every year and do such an amazing job.  They make it look effortless, but I know how much work it is!

This year they supplied us all with aprons (green of course) and added a live band, which was so great - it really added to the festivities.  They also had added a sponsor, Fletcher Fine Foods, who was there handing out meat for anyone who needed something extra to cook.  How cool is that!?!

Bacon-Wrapped Tater Tots


I started off the morning with my usual bacon-wrapped tater tots, always a big hit.  Very simple to do:  Wrap one-half strip of bacon around a frozen tater tot and place on a large circular perforated grill pan that you have sprayed with cooking oil first.  Press the bacon into itself where the end meets; it'll stick just fine.  No need to figure out how to stuff a toothpick through a frozen tater tot!  Cook indirect at about 375 degrees.  They take quite a while to cook, maybe 45 minutes.  Basically you're waiting for the bacon to crisp up.  Some people like to sprinkle a bbq rub over them, such as Dizzy Pig, but I prefer to have them just as is.


Roasted Balsamic Green Beans


Next up on my agenda were roasted green beans with balsamic vinegar, mushrooms, and Parmesan cheese.

1-1/2 Tablespoons olive oil
1 Tablespoon balsamic vinegar
1 pound green beans, washed and trimmed
salt and pepper
8 ounces mushrooms, sliced
2 Tablespoons Parmesan cheese

Combine the olive oil and balsamic vinegar and add the green beans; mix them to coat.  A plastic baggie worked great for me in the outdoor environment, but a bowl would be a little more eco-friendly.  Put the green beans in a perforated grill pan.  I used a square one with sloping sides.  Cook over indirect heat at 450 degrees.  Cook until the beans are the way you like them - I like them pretty well roasted.  Then put the mushrooms into the bowl/baggie and toss them around to coat them with what's left of the oil/vinegar mixture; then add them to the grill pan and continue grilling until the mushrooms are roasted, which doesn't take nearly as long as the beans.  Sprinkle the Parmesan cheese and close the lid for a couple minutes to melt the cheese a bit.  That's it.  Very yummy as a side dish and serves about 6 to 8 people.

Roasted Fingerling Potatoes


The package called these fingerlings.  They were completely round and I always think of fingerlings as being long and narrow.  Whatever they were, they were delicious grilled with some salt and pepper. And very colorful too!  These would be a great appetizer while you're waiting for the main course to cook.  They work fine as a side dish and I can see roasting them, then making them into mini 'crash' potatoes too.  I contemplated sprinkling them with herbs after they were grilled but in the end went with just the salt and pepper seasoning. I wanted to show that simple can be delicious.

I tossed these with about 1 Tablespoon of olive oil and some salt and pepper, again using a plastic baggie for convenience.  Then into my square perforated grill pan and grilled them over direct heat at about 400 degrees until they were cooked through.  They didn't take long, maybe 15 to 20 minutes.


Eenie Meenie Potato Casserole


Since my earlier experiment with Eenie Meenie's Potato Casserole was such a big hit at home, and since it could be prepped the night before, transported, and put onto the BGE with no additional work, I made it for Eggfest this year.  It was a very big hit.  I did three layers since I was feeding such a big crowd, and I used the mozarella cheese specified in the original recipe.

Jim was disappointed I didn't bring any of it home, so I made it again last night for dinner.  I do like the flavor of goat cheese mixed with whichever other cheese you choose, so I added that back in last night.

Coffee-Rubbed Pork Tenderloin with BBQ Peach Drizzle


For my last recipe, I did a pork tenderloin recipe from the BGE cookbook.  This recipe was provided by Ray Lampe, aka Dr. BBQ.  Since that cookbook is still in circulation and since I made it exactly as is with no changes at all, I will not post the recipe here.  But if you were to google the name of the recipe and click on the first link that comes up, you might find it on the web.  ;)

This was very good.  The peach drizzle reminded me of the sauce that goes with plum pork.  That might be because I may have accidentally used some yellow plum preserves rather than peach preserves - I'm not sure.  I know I used at least 3/4 peach preserves.  I'll have to make it again.  And I was talking with some of the cooks who were near me at the fest, and we decided it would be good using Greek coffee since that has more of a powdery texture, so I want to try that next time.  But you can just never go wrong with a grilled pork tenderloin.  They turn out perfectly every time - I've never been disappointed.  And they're easy and fast to do.  I should make them more often!

In between all this grilling, I had plenty of time to walk around, talk with people, and sample some of the food coming off other cooks' Eggs.


This was hands-down my favorite 'unusual' recipe on the BGE.  So unique.  They called it Roast Cabbage Stuffed with Bacon Jam, and it was cabbage, bacon, onions, bbq sauce, and butter.  They hollowed out the cabbage, stuffed it with the bacon, onions, and bbq sauce, then dotted with butter.  Covered it with foil, set it on the egg onto little foil rings for stability, and cooked it indirect.  It was on there for a while.  You could contact them at grillography@gmail.com if you wanted to ask them specifics.  Really a fabulous grilled vegetable.

Here it is all cooked up and ready to dig into!


 Just one of the many amenities AES provides.  Here are Everett, my favorite Egger in the world, along with Art's daughter serving up sno cones and popcorn.

Had my first taste of pig candy - bacon with sugar and who knows what else - it was great!  Thanks, Sean, James and Jason for this tasty treat!

No eggfest is complete without a pulled pork sandwich.

Delicious meatball sandwich provided by my neighbor cooks Dean, his wife, and son William who does not eat vegetables.  They cooked a ton of stuff, all of it great.

My  new favorite Seattle dance band - The Woodies.  These guys rocked; they played all my favorites.

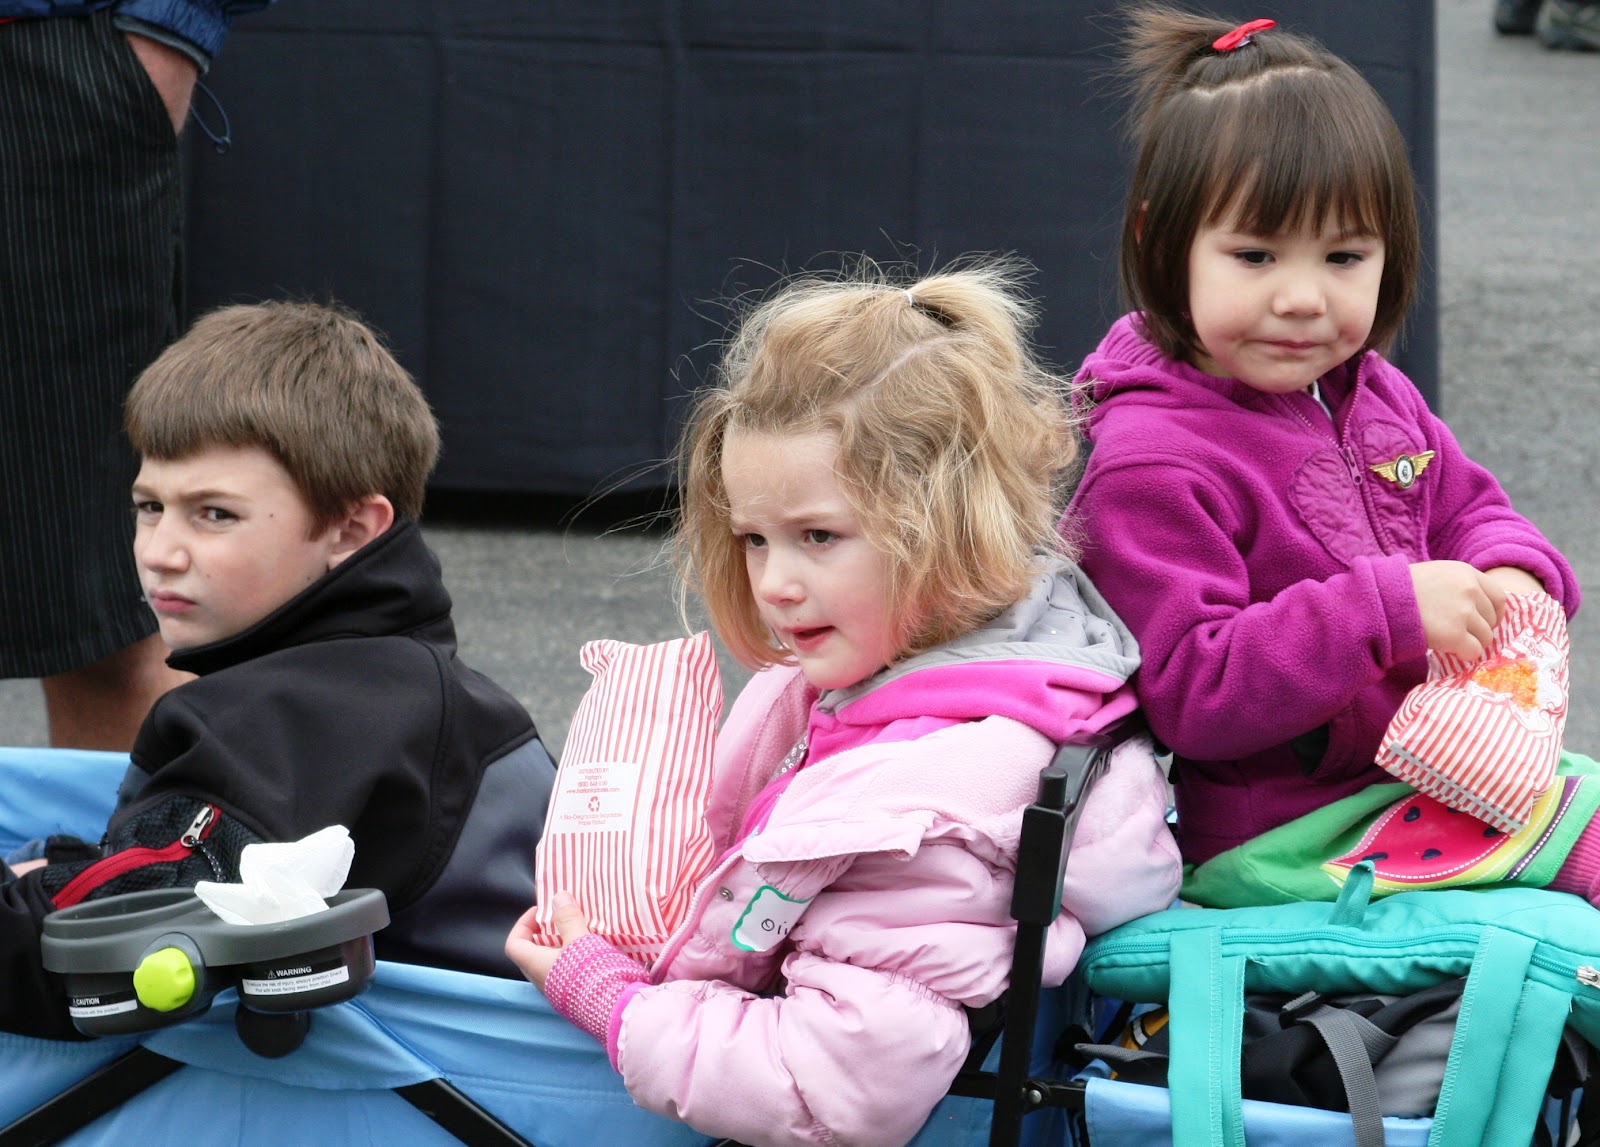
 These little cuties enjoyed the band, too, along with some nonEgged snacks.


  Seattle's hottest firemen cooked up some yummy stuff.


 Sadly I did not get to taste these stuffed baby bellas after they were cooked - the lines were just too long.  Guess I'll just have to make some of my own.

 These two strapping young fellows cooked up pancakes to order all day long - your choice of bluberry or chocolate chip....or a combo of both!
 
 Pancakes and beer - the breakfast of champion eggers

 Carnival area for kids of all ages, complete with balloon darts...

 
 ...egg bean bag toss...

 
...and photo opps!
(Me and Everett)

Besides working their butts off and providing all the generous raffle prizes, AES donated all proceeds to Rotary First Harvest.  That's what I call putting your money where your mouth is.

Another very fun day with friends, food, and fun - thanks AES - you guys are the greatest!


For more photos, go here.

Thursday, June 7, 2012

Art of the Pie

A couple years ago I had the opportunity to hear Kate McDermott from Art of the Pie speak at a Foodportunity event.  Ever since, I've been wanting to take one of her pie workshops.  Early in March this year, I finally had the chance to do just that.  All I can say is do not wait as long as I did to take one of her classes.  I've always been a decent pie maker, but I didn't love my crusts.  The recipes for crusts seem somewhat similar to me, but I was definitely lacking in technique.  I was also lacking confidence.  Confidence appears to be one of the main ingredients in pie!  And love.  It is necessary to put love into your pie.  Take one of Kate's classes - you'll walk away with not only a delicious pie, but also crazy mad pie-making skillz, and you'll have had a fun and memorable experience.   I learned more than I would have believed possible in Kate's class.  I've taken many many cooking classes over the years and besides being a pie virtuoso, Kate is a wonderful, wonderful teacher.


That's me second from the left.  I didn't bake up my pie that day.  I wanted to bring it home and freeze it for a cooking with fruit class I was teaching at Whidbey Gardening Workshop the following weekend.


Participation classes are so much fun.  One of my favorite activities is cooking with other people.
So I'm not going to post the entire crust recipe because you can go to her blog to get it, along with all her hints for making great crust.  But here are some of the tips I picked up from Kate:

Have everything chilled.  Yes, we know this and have done this in the past.  But I mean really cold as in freezer cold.  The cold is your friend.  (Finally, living in the PNW comes in handy for something!)  Put your bowl and flour in the freezer ahead.  I now keep a bag of flour in the freezer just for pie making.  If it's a warm day (like that ever happens around here), cool off your hands in a bowl of ice water as you work.   Obviously the butter, and leaf lard if you use it (and I highly recommend that you do), should be straight from the refrigerator.  While leaving it out on the counter to soften up ahead of time may work for some recipes, it does not work at all for pie crust.  cold Cold COLD is what you want.

All the bits and blobs of butter and leaf lard are what will make your crust tender and flaky.

Use your hands.  First of all, it's just easier.  Second of all, there's a lot of love in those hands and it transfers to the pie.  When mushing the flour, butter, and leaf lard together, you want different size pieces at the end--some grains of sand, some pea size, and some pecan size.  Don't work it too much.  If you don't want to use your hands, a pastry blender works too.

Kate had the same penguin ice bucket we have.  We inherited it from Jim's parents.
Amount of water to add--start with 3 tablespoons.  (Ice water.)  Then add one tablespoon at a time.  My pies usually take 8 tablespoons.  It depends on factors such as humidity, type/brand of flour you're using, and probably the moon phase.  Who knows!  But go slowly with the water.  You want just enough to hold the dough into a ball.  It's going to sit in the fridge for an hour after you make it, and it'll relax a bit while it does that.

Now, about that leaf lard.  Leaf lard is the fat from around a pig's kidneys.  It makes for very clean, neutral-tasting fat, and is perfect for pastries.  It has less saturated fat than butter.  Personally, I don't worry about either.  It's not like I have pie every day or even every month.  Everything in moderation.  And remember my number one motto:  Fat is what they put in food to make it taste good.  If you're not going to have a great-tasting end result, why bother?  Kate has put together an informative post about leaf lard, so read it here.  And if you live on Whidbey, Scotty's can get it for you.  (Isn't he the greatest?)  It will be unrendered, but it's easy to render yourself.  It's very easy and there are lots of web pages on how to do it. 

Work quickly (so things don't warm up) and don't worry about perfection.  If the crust tears a bit here or there, you can patch it up before putting in the filling.  Once the pie is baked, it's going to look and taste fabulous, so don't worry about little problem spots.  Don't even worry about big problem spots.  Trust that it will turn out, and it will.


Don't wash your bowl between making the crust and the filling.  The left-overs from the crust will add thickner to the filling.  This is my favorite bowl I inherited from my aunt Helen.  Pies made in this bowl always taste better.  It's because of the extra love.


Use the very best ingredients you can find.  Make sure your fruit is pie worthy.  Local, organic, and seasonal is always best.  For my berry pies, I've been using frozen, but I get the organic stuff in the clear plastic bags where you can see the fruit you're buying.  The berries are huge and have been individually frozen so they're not all frozen together in big clumps.  There's no need to thaw the berries ahead of time.


Kate showed us how to measure out the amount of fruit by putting it in the empty pie plate first.  Berries and other fruits that may turn very juicy while baking should be a bit below the rim of the pie plate.  Otherwise you may end up with a mess on the floor of your oven.  Since my oven is completely self-cleaning, all the time, I don't really care if it bubbles over and I have been putting my berries up about to the rim of the pie plate.  With apples, you want them mounded up high in the pie.  Pile your whole apples in the pie plate ahead of time and you can get a good enough idea of how many to use by just doing that.  So you don't have to worry about how many of your apples are large or medium or small.


Variety is the spice of life, so use many different apple varieties for your apple pies.  You want some that will bake up firm and some that will bake up softer, some that are tart and some that are sweet.  If you only have one kind, that's perfectly fine.  But if you have a variety, even better.

Kate uses a vintage Veg-O-Matic to chop apples.  I scored one from Ebay for $20 including shipping!
 You do not have to peel your apples.  I quit peeling apples for other dishes a long time ago.  But I still would peel them for pies.  Kate gave me permission to not peel apples for pies ever again.  That alone was worth the price of admission.

Kate shows us how to measure one 'oops' of Calvados brandy to flavor the filling.
Liquor in the filling adds a nice touch.  I always keep the airplane size bottles of liquors in my cupboard for cooking and baking purposes.  That way you can always add a splash of Grand Marnier or brandy without having to give up a lot of cupboard space for big bottles of booze, not to mention the cost factor.  Unless, of course, you normally drink a lot of that stuff.  In that case, go for the big bottle!  And invite me over.


It would be easy to eat the filling before it even gets into the pie!
Now that the filling is ready, get your dough out of the fridge.  It should have been in there about an hour.  You've made enough for a double crust pie, so divide it in half and return one half to the fridge.  Lay the other half out on a floured pastry cloth (keep it in the freezer so it's cold too) and give each side a good whack with the rolling pin.

Roll from the center outward, rolling in one direction only.  Turn the dough as you go.  It should be sliding around on the pastry cloth as it gets bigger.  Otherwise, flip it over and dust with more flour.

A french rolling pin gives you more control and allows you to build a more circular pie crust.
Use lots of flour so the crust won't stick.
Shape doesn't really matter too much as you're going to be trimming it...and using your trimmings to make little cinny rolls to snack on while you wait for that pie to bake.

Make sure you've rolled it out large enough.  You'll want about a half inch overhang AFTER you've pressed it down into your pie plate.

Use a brush to brush off the excess flour.

Roll it over your rolling pin to help transfer the dough to the pie plate.

Brush the excess flour from the underside of the dough.

And transfer it to your pie plate.

Gently push it down into the pie plate.
Use an upside down tin to press lightly on the fruit to compact it a bit.
After you put the top crust on, trim the crusts to about 1/2 inch from the edge of the pie plate.  Don't forget to save them to make cinny rolls.

Now roll the edges of the pie crust inwards and then press with a fork or crimp to make an edge.

Cut some slits to let stream escape.
Brush with an egg wash and sprinkle with sugar.

We learned how to tell when the pie was done by using all the senses, including hearing.

Within a week of taking Kate's class, I turned out a delicious blueberry pie with lattice crust!  I've also made a couple marionberry pies as well as pumpkin pies.  I cannot wait for peach season as I have several peach pie recipes to try out.  Pie has become my new favorite thing to make!


I now know that it's so much more than just a recipe--it's a combination of love, confidence, ingredients and technique combined with the knowledge of what to look for every step of the way--it is truly an art.


Blueberry Pie

2 bags of organic frozen blueberries (no need to defrost them first)
1 Tablespoon tapioca
2/3 cup sugar
splash of Grand Marnier
splash of lemon juice
pinch of nutmeg
2 Tablespoons flour
1 teaspoon kosher salt
optional - small amount of chopped lemon verbena or lemon thyme

Mix all of the above together in the same bowl you used to make the crust.  After laying the bottom crust in the pie plate, pour in the blueberry filling.  This makes enough for a 9-inch pie.  Dot the filling with small pieces of butter.  Then lay your top crust.  I like a lattice crust on blueberry pies.  There are a lot of youtube videos on how to crisscross a lattice crust.  Here's one.  It's really easy.  Flute the edges after you've laid out the lattice. Then beat in a small bowl one egg white and 1 Tablespoon of water.  Brush that on top of the crust.  Sprinkle sugar over the crust.

Bake at 425 degrees for 20 minutes; then lower the temp to 350 degrees and bake 30 - 40 minutes more.  It's always tempting to pull the pie before it's ready.  I almost always bake the pie for longer than the time called for.  For the first phase, I bake right on the floor of the roasting oven.  For the second phase I bake either in the middle of the baking oven or near the top, depending on what temps are called for in the recipe.


Pumpkin Pie

3 beaten eggs
2 cups canned or cooked pumpkin
1 cup evaporated milk or coconut milk
3/4 cup sugar (use half white sugar and half brown sugar)
1/2 teaspoon salt
1-1/2 teaspoons cinnamon
1-1/2 teaspoons ginger
1/2 teaspoon nutmeg
1/2 teaspoon allspice
1/4 teaspoon cloves
splash of brandy

Mix all the above ingredients either in a stand mixer or by hand.  Pour into pie crust.  This makes enough filling for an 8-inch pie.  Bake for 15 - 20 minutes at 425; then bake at 350 until the custard filling is nearly set.  The total time is usually about 1 hour.  Cool completely.  Serve whipped cream on the side.


Berry Pie

1-1/2 pounds frozen or fresh berries (no need to thaw if frozen)
3/4 cup sugar
1/2 teaspoon salt
pinch of nutmeg
splash (1 capful) of lemon juice
splash of Grand Marnier or other liquor
1 Tablespoon tapioca
2 Tablespoons flour

Mix the filling ingredients together in the same bowl you mixed the crust in.  After laying the bottom crust in the pie plate, pour in the berry filling.  This makes enough for a 9-inch pie.  Dot the filling with small pieces of butter.  Then lay your top crust.  Cut vents in the top crust and flute the edges.  Then beat in a small bowl one egg white and 1 Tablespoon of water.  Brush that on top of the crust.  Sprinkle sugar over the crust.

Bake at 425 degrees for 20 minutes; then lower the temp to 350 degrees and bake 30 - 40 minutes more.  It's always tempting to pull the pie before it's ready.  I almost always bake the pie for longer than the time called for.  For the first phase, I bake right on the floor of the roasting oven.  For the second phase I bake either in the middle of the baking oven or near the top, depending on what temps are called for in the recipe.


Cinnamon Rolls

When I was growing up, my mom always made tiny cinnamon rolls with the leftover pie dough.  Just roll the leftover dough out in a rough rectangular shape.  Spread softened butter on over one side, sprinkle liberally with cinnamon and sugar, then roll it up.  Cut into little pieces and bake on a small cookie sheet type of pan.  You can put them in right along with the pie, but they'll only take 10 or 15 minutes.  Now you have something to eat while you wait to dig into that pie!