Here is how to make the potatoes in Eenie's own words:
Basically, rub garlic around a pan ( I usually use ceramic or Pyrex), then
smear bottom and sides with olive oil. Thinly slice potatoes (use a mandoline if
you have one) about an 1/8 of an inch or slightly more. Then rinse them and dry
them (it would be better to not rinse them then to not have them dry). Then
very thinly slice an onion (I use a sweet onion). If it's a large diameter
onion, then further cut up the round rings so that they are about two to two and
a half inches. Slice some tomatoes about 1/4 inch thick and salt them and set
them aside to drain. If you do not have ripe and tasty tomatoes you can drain
some canned tomatoes.....drain them well. Remove any seeds. If they are whole
tomatoes, just break them up with your hands or cut with scissors into big
chunks. Chop up some fresh basil, parsley, and oregano (mostly basil and
parsley, just a little oregano) and set aside. Mince some garlic and set
aside..
In a ceramic or Pyrex, or baking dish, layer a layer of
overlapping potatoes, then a layer of tomatoes, then a layer of onions. Then
sprinkle on some chopped basil, parsley, garlic, oregano and salt and pepper.
Repeat this entire process one or two more times depending upon the depth of
your baking dish. Don't worry if it goes to the top.....it will shrink down
considerably.
Top with several pats of butter, then top with foil. Bake at around 350 or so for an hour to an hour and a half (until the potatoes are almost done. Then top with shredded mozzarella until it is melted. If it doesn't brown, then place it under the broiler.
It is important not to serve this immediately......the potatoes need to soak up some of the juices. Let it rest for about 15 - 20 minutes or whatever.
Basically use the herbs you like and the proportions you like. I go heavy on the basil and parsley and light on the oregano.
This can be made ahead of time, up until the cheese part and refrigerated. Let it warm up almost to room temp, then reheat. After it is reheated, top with cheese.
Here's a link to the post, if that's of any help.
Top with several pats of butter, then top with foil. Bake at around 350 or so for an hour to an hour and a half (until the potatoes are almost done. Then top with shredded mozzarella until it is melted. If it doesn't brown, then place it under the broiler.
It is important not to serve this immediately......the potatoes need to soak up some of the juices. Let it rest for about 15 - 20 minutes or whatever.
Basically use the herbs you like and the proportions you like. I go heavy on the basil and parsley and light on the oregano.
This can be made ahead of time, up until the cheese part and refrigerated. Let it warm up almost to room temp, then reheat. After it is reheated, top with cheese.
Here's a link to the post, if that's of any help.

If you have any flavored oils, now's a good time to break them out. I used this on the inside of the casserole after I rubbed it with garlic.

First layer of sliced potatoes.

Then the onions.

Tomatoes are next.

Then the chopped herbs. I didn't have any oregano, so I used parsley, basil, and thyme.
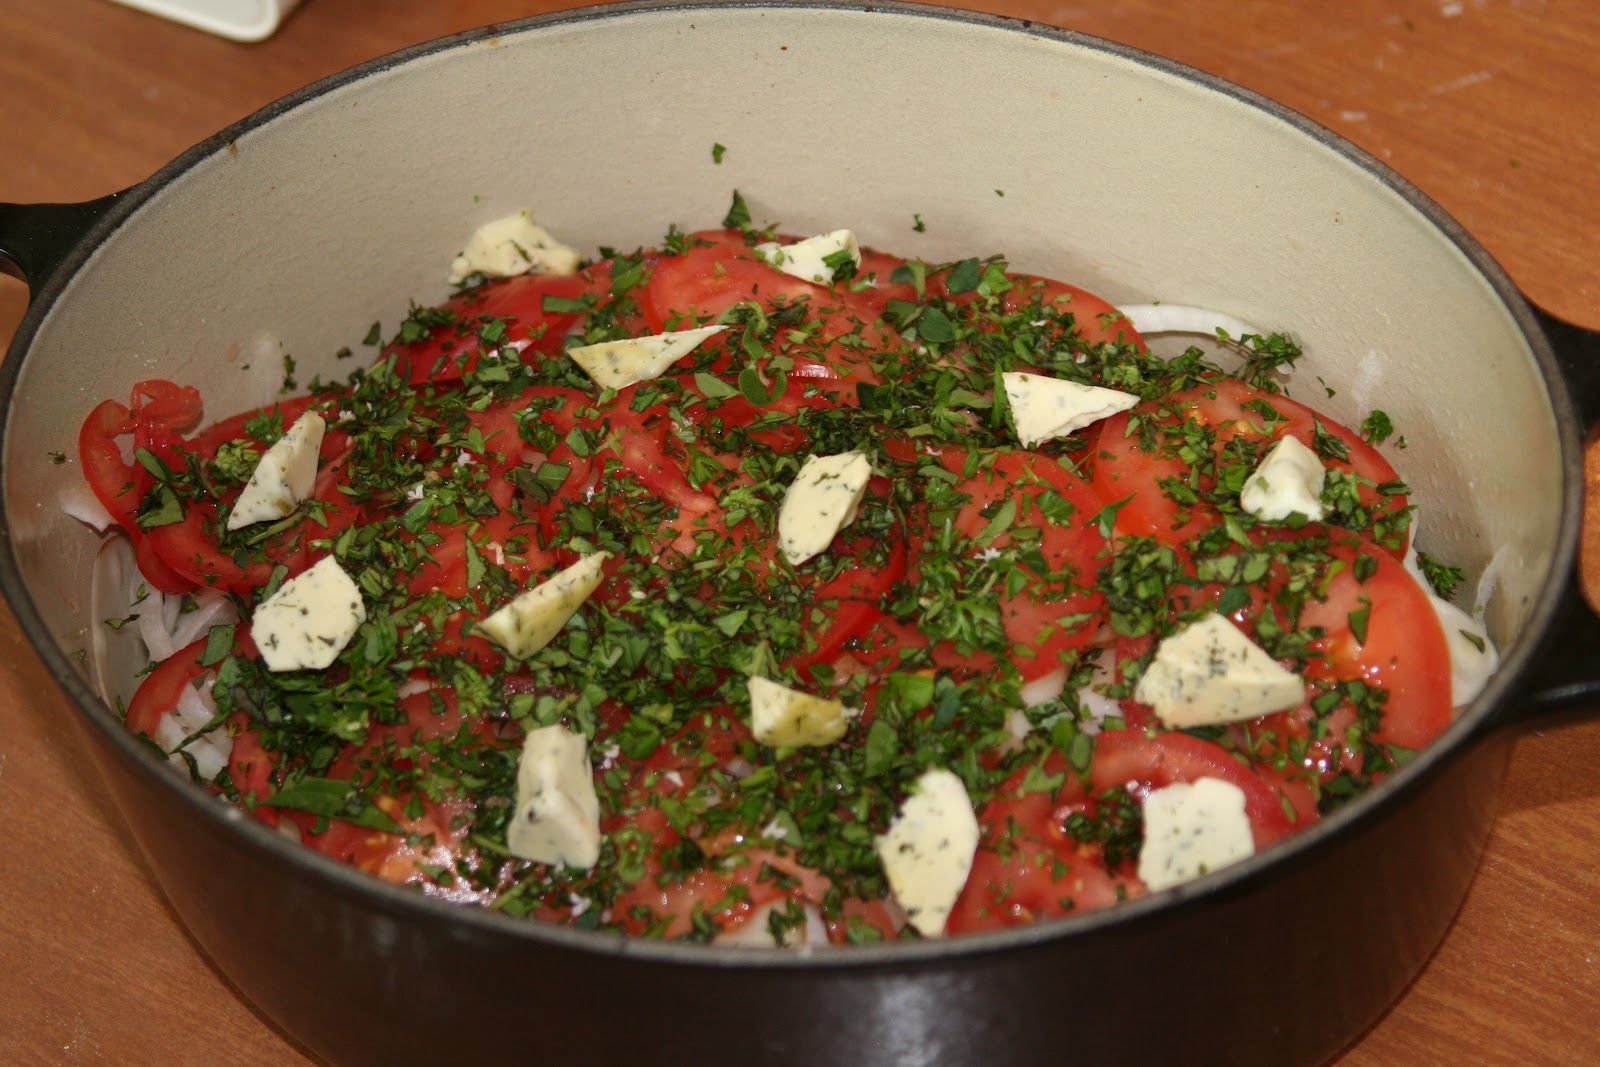
I had a wee bit of Kerrygold herb butter, so I used that to dot over the layers. This was 1 tablespoon worth.
I used two potatoes, three tomatoes, and one onion. I would have liked more onion, but only had the one on hand. I did two layers since it was just myself and Jim. Also, I used a ceramic casserole with a lid and I cooked them on the BGE instead of in an oven.

While the potatoes were resting, we grilled the steaks at 275 degrees for 15 minutes, then flipped them and laid some sliced mushrooms on top. Finished off grilling until they registered 135 on the Thermapen, which was another 5 to 10 minutes.
We put the asparagus on at the same time as the steaks, but pulled the asparagus when it was finished. After peeling the asparagus and snapping off the tough ends, I tossed it in my flavored oil, sprinkled on some salt and pepper, and put it in the grill pan. I love roasted veggies and grilling them is even better.

This is my handy-dandy asparagus peeler. It's one of my favorite kitchen tools because it makes peeling asparagus so easy. It looks pretty innocent laying there on the cutting board, but it's actually quite wicked!

In the grill pan and on the Egg. For best texture, grill at a hot temp so it gets very roasted without getting mushy.

We decided that we were not fans of New York steak. They were cooked perfectly with just the right amount of pink, but they were still tough and blah tasting. Buddy lucked out because he got most of both our steaks!

The asparagus was my favorite part followed closely by the potatoes. Dessert was also tasty. We ended the meal with a pumpkin pie. Jim accidentally bought a can of pumpkin pie filling instead of regular pumpkin (Buddy is on a doggy diet and pumpkin is great for dogs trying to shed a few pounds), and I opened it up without looking at the label, so we needed to get it used up. I'll be putting up a full-on pie tutorial in the very near future, but here's the recipe I used for this pie:
Pumpkin Pie
Crust
2-1/2 cups flour
1 teaspoon kosher salt
6 tablespoons leaf lard
9 tablespoons European-style butter
8 tablespoons water
Filling
2 cups pumpkin pie filling
1 cup coconut milk
3 beaten eggs
extra spices - allspice, cloves, cinnamon, nutmeg
Preheat the oven to 425. When you put the pie in the oven, turn the heat down to 375. Bake for 50-60 minutes. If you're baking the pie in an Aga, put it on the floor of the roasting oven for 15 minutes. Then move to the top rung of the baking oven for 45 minutes. Pie perfection!

Mix the dough so that the butter bits vary in size.

I found this little 'cheater' thing a few years ago. You put the floured dough inside this pouch, zip it up, and roll it out. It makes it almost perfectly round. It's small, though, and so I have to then remove the dough and roll it larger. If you have a french rolling pin, which I do not, you can achieve a very round dough without this gadget. Still, it's a pretty fun and handy thing to have.

 |
I like to vary how I crimp the edges. Here I used two fingers to push pieces together and twisted it slightly to one side.


This pastry scraper is another handy tool. If the dough sticks to your rolling surface, you can use it to scrape the dough up without tearing it.

Pie perfection!

I'm already looking forward to a piece for breakfast tomorrow!!!
A pretty tasty dinner in remembrance of our fathers, who both were in the Navy. My dad died back in 1980. He was 54. He had a heart attack in his sleep. Jim's dad died of brain cancer in 1986, three months before our wedding. He was 65.
On this Memorial Weekend, I am eternally grateful to all the men and women who serve and have served in the military and am very sad that so many have had to give their lives doing so. Today my thoughts and prayers go out to all deceased and living veterans as well as their families who have also sacrificed so much for our country.


